Full-Screen UI Mode
The full-screen UI is the default mode for the lcyt CLI. It provides a rich, multi-panel terminal interface for live captioning sessions.
Starting Full-Screen Mode
lcyt          # opens full-screen UI automatically when no other flags are given
lcyt -f       # explicit flag
lcyt --fullscreen
On the very first run (no stream key configured), the CLI launches a short setup wizard instead of the full-screen UI. After entering your stream key, the full-screen UI starts.
Panel Layout
The screen is divided into four panels:
| Panel | Location | Purpose |
|---|---|---|
| Text Preview | Top-left | Shows the next line to be sent from a loaded file |
| Log | Bottom-left | Operational messages and caption send results |
| Sent Captions | Right | Rolling history of captions delivered to YouTube |
| Input Field | Bottom | Type captions or slash-commands here |
Sending Captions
Type your caption text in the Input Field and press Enter to send it immediately. The caption is delivered to YouTube and logged in the Sent Captions panel.
Loading a File
Use the /load command to load a plain-text script, then step through it line by line:
/load /path/to/script.txtOnce a file is loaded, the Text Preview panel shows the current line. Use the arrow keys to navigate and Enter to send the current line.
Commands
Type a slash-command in the input field and press Enter:
| Command | Description |
|---|---|
/load <path> | Load a caption script from a file path or URL |
/batch | Toggle batch mode — queue captions before sending |
/send | Send the batch queue immediately |
/api <path> | Load a Google API credentials JSON for YouTube status polling |
/stream <url-or-id> | Set a YouTube video ID or URL to poll for live status |
/reset | Reset the sequence counter to 0 |
/quit | Exit the full-screen UI |
Batch Mode
Batch mode lets you queue multiple captions and send them as a group:
- Type
/batchto enable batch mode. - Enter each caption and press Enter — lines are queued but not sent yet.
- Type
/send(or press the batch-send shortcut) to deliver the whole batch at once.
Keyboard Shortcuts
| Key | Action |
|---|---|
| Enter | Send current line or command |
| ↑ / ↓ | Navigate through loaded file lines |
| Page Up / Page Down | Scroll the Sent Captions panel |
| Ctrl+C | Exit |
Options
All connection options can be set once and are saved to ~/.lcyt-config.json:
lcyt --stream-key YOUR_KEY   # Set stream key (saved for future sessions)
lcyt --base-url URL          # Override ingestion URL
lcyt --region reg1           # Set region identifier
lcyt --verbose               # Enable verbose logging
Interactive Mode
Interactive mode reads captions line by line from standard input. It is useful for scripting, piping text from another program, or captioning in a terminal without the full-screen UI.
Starting Interactive Mode
lcyt -i
lcyt --interactive
Once started, the CLI waits for you to type a line and press Enter. Each line is sent to YouTube as a separate caption.
How It Works
$ lcyt -i
> Hello, welcome to the stream!       ← you type this, then Enter
✓ Caption sent [seq 1]
> Today we will be discussing...
✓ Caption sent [seq 2]- Each line you enter is sent immediately after pressing Enter.
- The sequence counter increments automatically.
- Press Ctrl+D (EOF) or Ctrl+C to quit.
Reading from a File or Pipe
Because interactive mode reads from stdin, you can pipe any program’s output directly into it:
# Send all lines of a text file, one by one
cat script.txt | lcyt -i

# Send output of a real-time transcription tool
my-transcriber | lcyt -i
When stdin is a pipe (not a TTY), the CLI reads lines until EOF and then exits automatically.
Options
| Flag | Description |
|---|---|
-i, --interactive | Enable interactive/pipe mode |
-k, --stream-key KEY | YouTube stream key |
-t, --timestamp ISO | Manual timestamp override for every caption |
--heartbeat | Send a single heartbeat and exit (useful to test the connection before starting) |
--verbose | Print detailed HTTP request/response information |
--log-stderr | Write log output to stderr (useful when stdout is consumed by a pipe) |
Example: Scripted Session
#!/bin/bash
# Send a series of pre-written captions with a delay between each
captions=(
  "Welcome to the show!"
  "Today's topic: live captioning"
  "Stay tuned for more"
)

for caption in "${captions[@]}"; do
  echo "$caption" | lcyt -i
  sleep 5
done
Notes
- Interactive mode does not display the full-screen blessed UI; it is purely text-based and safe to use in CI pipelines, cron jobs, or scripts.
- The stream key must be configured either via
--stream-keyor stored in~/.lcyt-config.jsonbeforehand. - Timestamps default to the current system time unless overridden with
--timestamp.
Single Caption Mode
Single caption mode sends one caption (or a batch of captions) and exits immediately. It requires no interactive input and is the simplest way to send a caption from the command line or a script.
Sending a Caption
Pass the caption text as a positional argument:
lcyt "Hello, world!"
lcyt "Welcome to the stream!"
The caption is sent once and the process exits with code 0 on success or 1 on failure.
Setting the Stream Key
If you have not configured a stream key yet, set it with --stream-key. The key is saved to ~/.lcyt-config.json for future use:
lcyt --stream-key YOUR_KEY "First caption with key"After the key is saved you can omit it in subsequent calls:
lcyt "Second caption"Timestamp Override
By default the current time is used. Supply an explicit ISO timestamp with -t:
lcyt -t "2024-06-01T10:00:00.000" "Caption with a custom timestamp"Batch Mode
Queue multiple captions across separate invocations and send them all at once:
# Queue captions (stored in ~/.lcyt-config.json)
lcyt -b "Line one"
lcyt -b "Line two" -t "2024-06-01T10:00:05.000"
lcyt -b "Line three"

# Send the queue in a single request
lcyt --send
The --send flag delivers all queued captions and clears the queue.
Heartbeat / Connection Test
Send a heartbeat to verify that the connection and stream key are working without sending a real caption:
lcyt --heartbeatA successful heartbeat prints a confirmation and exits with code 0.
All Options
| Flag | Short | Description |
|---|---|---|
--stream-key KEY | -k | YouTube stream key |
--base-url URL | -u | Override ingestion URL |
--region ID | -r | Region identifier (default: reg1) |
--cue ID | Cue identifier (default: cue1) | |
--timestamp ISO | -t | Manual timestamp override |
--batch | -b | Queue caption instead of sending immediately |
--send | Send all queued batch captions | |
--heartbeat | Send heartbeat and exit | |
--reset | Reset sequence counter to 0 | |
--show-config | Print current configuration | |
--verbose | -v | Enable verbose logging |
--log-stderr | Route logs to stderr | |
--config PATH | -c | Use a custom config file path |
Exit Codes
| Code | Meaning |
|---|---|
0 | Caption sent successfully |
1 | Error (network failure, invalid key, etc.) |
LCYT — Live Captions for YouTube
LCYT (Live Captions for YouTube) lets you send real-time closed captions to a YouTube Live stream directly from your browser, using Google’s official HTTP POST caption ingestion API.
It is especially useful for non-English broadcasts — you can send captions in any language to make your stream accessible to a global audience.
What you can do with LCYT
| Feature | Description |
|---|---|
| Live captioning | Type captions manually and send them with a single keystroke |
| Speech-to-text | Use your microphone with automatic speech recognition (browser API or Google Cloud STT) |
| File playback | Load a pre-written script and step through it line by line |
| Translation | Automatically translate captions to a second language |
| Viewer page | Broadcast captions to audience members via a public SSE-based viewer page (no YouTube account needed on the viewer’s side) |
| RTMP relay | Re-stream your audio/video to up to 4 destinations simultaneously with embedded captions |
| CEA-708 captions | Embed captions directly in the RTMP video stream (requires ffmpeg with CEA-708 support) |
| HLS streaming | Serve a live HLS video+audio stream via the backend (embeddable in any web page) |
| Radio HLS | Serve a live audio-only HLS stream via the backend |
| Stream preview | See a live JPEG thumbnail of your incoming RTMP stream in the web UI |
| DSK overlay | Overlay PNG/WebP/SVG graphics on the relayed video using a downstream keyer (green screen) page |
| Embed widgets | Drop standalone <iframe> widgets into any site — audio, input bar, file player, full file UI, viewer, settings, or RTMP relay |
| Dark & light mode | Comfortable UI in any environment |
| Mobile support | Fully usable on phones and tablets with a dedicated mobile bar |
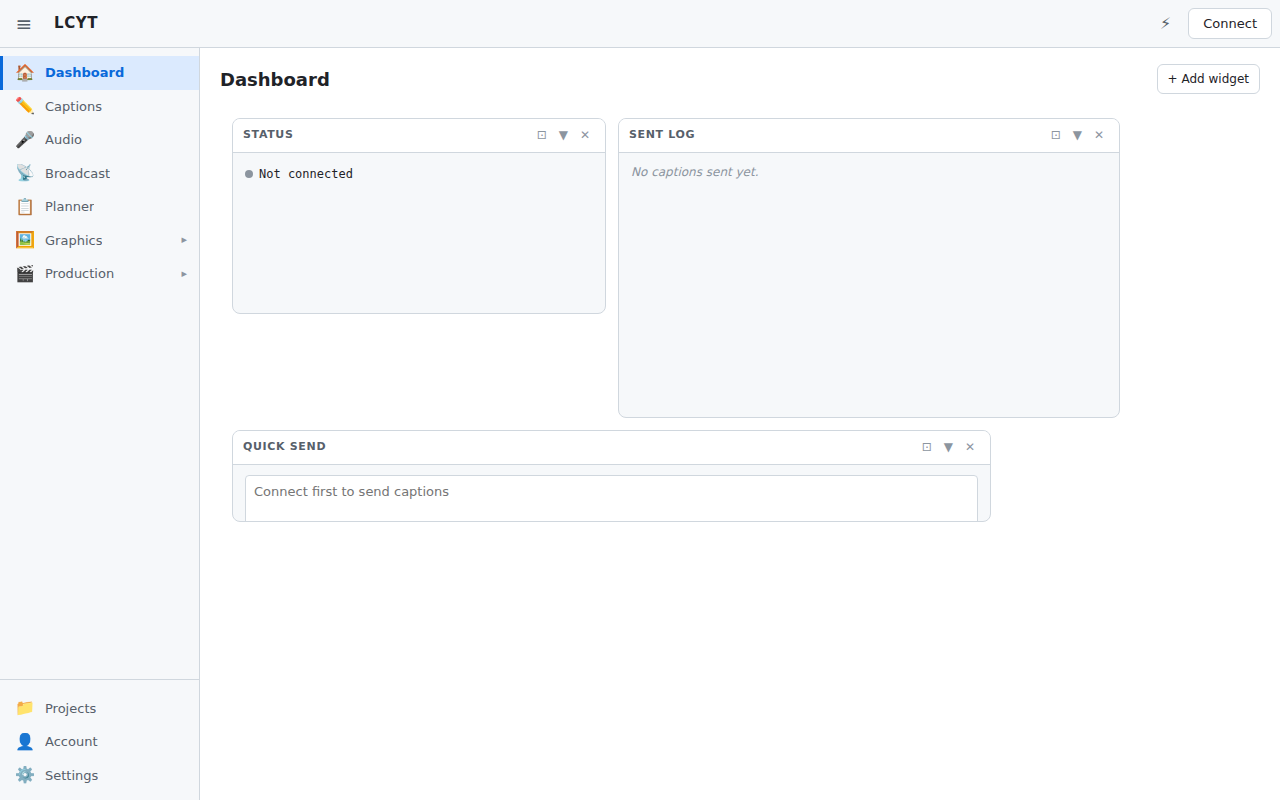
Dashboard
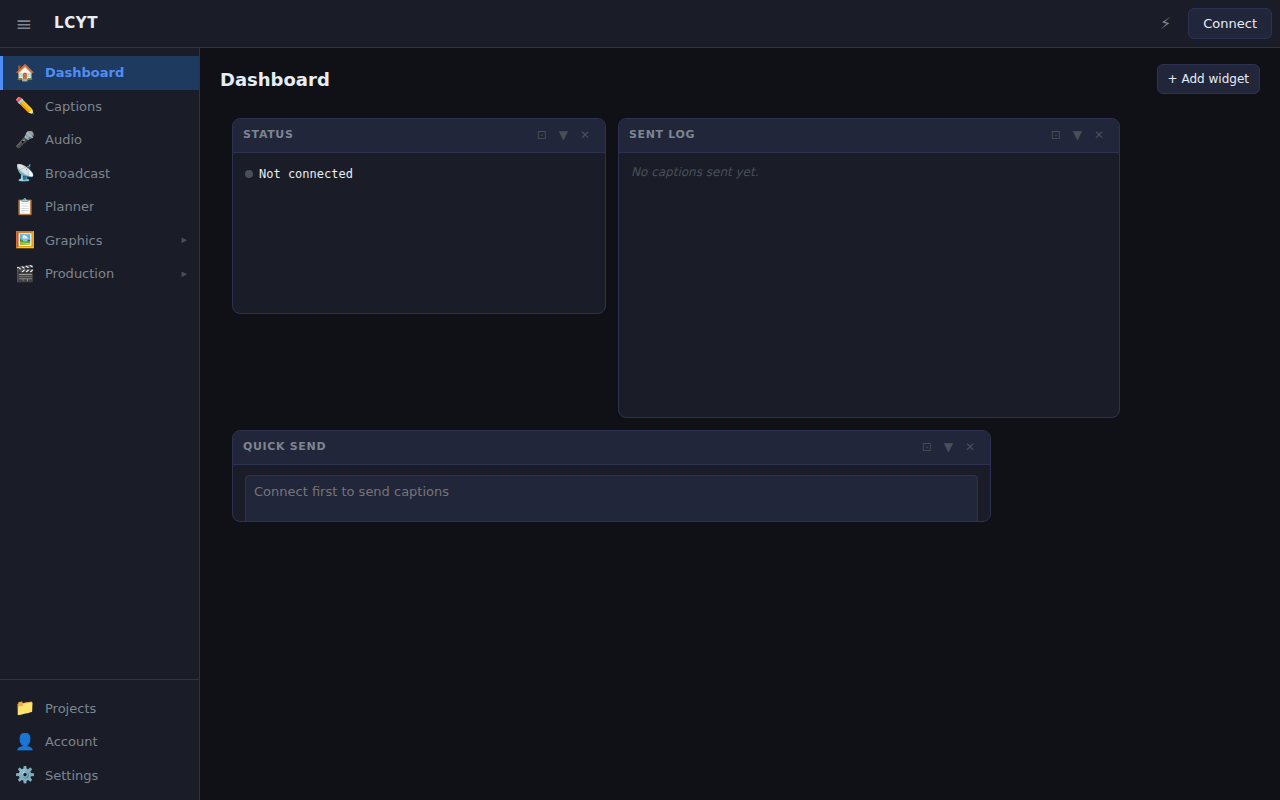
The main dashboard is split into two panels side by side (or stacked on mobile):
- Left panel — Drop zone for script files, file tabs, the caption preview, and the microphone / audio meter
- Right panel — Log of all captions sent during the current session
The status bar at the top contains five buttons:
| Button | Purpose |
|---|---|
| Connect / Disconnect | Toggle the backend session (green = connected, red on hover = click to disconnect) |
| Settings | Configure connection credentials, theme, language, text size, and advanced options |
| CC | Configure speech recognition, caption targets (receivers), details, and translation |
| Controls | View session status and run diagnostic actions |
| Privacy | Review the privacy policy |

The input bar at the bottom is where you type and send captions.
Project components
| Component | Description |
|---|---|
| lcyt-web | Browser-based web app (this guide) |
| lcyt-cli | Command-line tool for sending captions from a terminal |
| lcyt-backend | Express.js relay backend (multi-user, API keys) |
| lcyt (npm) | Node.js library for direct YouTube caption ingestion |
| lcyt (PyPI) | Python library with the same API |
| lcyt-mcp | Model Context Protocol server — lets AI assistants send captions |
Next steps
- Getting started — set up your stream and API key
- Sending captions — all the ways to send captions
- Caption settings — the CC modal: receivers, speech recognition, details, and translation
- General settings — the Settings modal: connection, theme, relay, and stream
- Status & Actions — the Controls panel
- Keyboard shortcuts — full shortcut reference
- Embedding in another site — iframe widgets for integration into production tools and custom dashboards
Getting Started
This guide walks you through the full setup from a brand-new account to your first live caption.
Prerequisites
Before you start you need:
- A YouTube Live stream with a 30-second delay enabled
- An LCYT API key (free — see below)
- A modern browser (Chrome, Edge, or any Chromium-based browser recommended)
Step 1 — Enable closed captions in YouTube Studio
- Go to YouTube Studio → Go Live.
- In your stream settings, open the Advanced tab.
- Enable Closed captions and choose the HTTP POST method.
- Set the stream delay to at least 30 seconds (required by the caption API).
- Copy your Stream Key — you will need it shortly.
Step 2 — Get a free API key
Visit lcyt.fi/app and fill in the free-key form with your name and email address. Your key is emailed to you instantly and works for up to 200 captions per day for 30 days.
Tip: Paid keys with higher limits and longer validity are available — contact the LCYT team.
Step 3 — Open the web app
Navigate to app.lcyt.fi.
On the first visit the Privacy modal opens automatically. Read the policy and click Accept to continue.

Step 4 — Enter your credentials
Click Settings in the top status bar to open the Settings modal.

Fill in the Basic tab:
| Field | Value |
|---|---|
| API Key | The key you received by email |
| Stream Key | Copied from YouTube Studio |
| Backend URL | https://api.lcyt.fi (default — leave as-is) |
Your credentials are saved automatically as you type. Close the modal when done.
Optionally enable Auto-connect to reconnect automatically on every visit.
Step 5 — Connect
Click the Connect button in the top status bar.
- The button turns green when the session is established.
- To disconnect, click the button again (it turns red on hover to confirm).
Step 6 — Send your first caption
Type a test caption in the input bar at the bottom of the page and press Enter (or click Send).

The caption appears in the Sent log on the right and is delivered to your YouTube stream within a few seconds.
Troubleshooting
| Symptom | Likely cause | Fix |
|---|---|---|
| Settings opens instead of connecting | No credentials saved | Fill in API Key + Backend URL in Settings → Basic |
| ”Connection failed” | Wrong API key or backend URL | Double-check both fields in Settings |
| Captions not appearing on stream | Stream delay or captions not enabled | Enable HTTP POST captions in YouTube Studio |
| Network banner (⚠) | Backend unreachable | Check your internet connection; the app retries every 30 s |
| Clock offset warning | Server and browser clocks differ | Click ⟳ Sync Now in the Controls panel |
Sending Captions
LCYT gives you several ways to get text onto the stream. You can use them in any combination during a session.
The input bar
The input bar sits at the bottom of the app. Type your caption text here and press Enter to send it immediately.
- Clear — remove the text without sending
- Send button — same as Enter
Tip: After sending, the input bar is cleared automatically so you can type the next caption right away.
Microphone (Speech-to-Text)
Click the microphone button (🎙) to start continuous speech recognition. Words are transcribed and displayed in the caption preview area in real time. The system sends each completed utterance as a caption automatically.
See Caption settings → Model tab for engine and language selection.
Desktop
The audio meter and mic toggle are embedded in the left panel.
Mobile
On phones, the mic button lives in the mobile audio bar at the bottom of the screen.

The mobile bar contains (left to right):
| Button | Action |
|---|---|
| Audio meter | Shows microphone volume in real time |
| 🎙 / ⏹ | Toggle speech recognition on/off |
| − | Go to previous line (script mode) |
| ► | Send current line |
| + | Go to next line (script mode) |
Loading a script file
You can load a pre-written caption script (plain text, one caption per line) by:
- Dragging and dropping the file onto the drop zone in the left panel, or
- Clicking the drop zone to open a file picker.
Once loaded, the file appears as a tab above the caption view. The current line is highlighted.
Navigating and sending file captions
| Action | Keyboard | Mobile |
|---|---|---|
| Send current line | Enter | ► button |
| Next line | ↓ / Page Down | + button |
| Previous line | ↑ / Page Up | − button |
| First line | Home | — |
| Last line | End | — |
| Cycle file tabs | Tab | — |
Caption file format
Caption files are plain text (.txt), one caption per line. In addition to plain text, the file format supports metadata comments, stanza blocks, and empty-send markers.
Metadata comments
HTML-style comments on their own line attach metadata codes to all subsequent caption lines. Any key is accepted.
<!-- lang: fi-FI -->
<!-- section: chorus -->
<!-- speaker: Alice -->
<!-- lyrics: true -->
<!-- no-translate: true -->
To clear a code, set its value to empty:
<!-- lang: -->Metadata comment lines are not sent as captions.
Stanza blocks
A stanza block attaches multi-line “singing aid” text to subsequent captions so viewers can see the upcoming lyrics. Open the block with <!-- stanza (no closing -->), write the stanza lines, then close with --> on its own line.
<!-- stanza
Amazing grace, how sweet the sound
That saved a wretch like me
-->
Amazing grace, how sweet the sound
That saved a wretch like me
The stanza text is pushed to the viewer when the first caption in the block is sent. To clear the stanza, add an empty block:
<!-- stanza
-->
Empty-send markers
A line containing only _ fires the current metadata codes (including the active stanza) to the viewer without sending any caption text to YouTube. This is useful for pushing a stanza to the viewer before the singing starts.
<!-- stanza
Amazing grace, how sweet the sound
-->
_
Amazing grace, how sweet the sound
You can optionally add a label after the underscore. The label is shown in red in the caption view as a visual cue for the operator — it is never sent to YouTube.
_ Show verse 1
_ ♪ Chorus
_ [pause here]
A bare _ displays a dimmed ⊘ send codes indicator. A labeled _ text displays the label text in red.
Batch mode
Batch mode lets you queue multiple captions and send them at regular intervals. This is useful for pre-written scripts where you want smooth, evenly timed delivery.
Configure the batch interval in Caption settings → Other tab.
Sent captions log
The right panel shows every caption you have sent in the current session, newest at the top. You can scroll back to review what was sent.

Caption Settings (CC)
Click CC in the top status bar to open the Closed Captions modal. It has up to four tabs, with the Details tab visible only in advanced mode.
Receivers tab {#receivers}
The Receivers tab is the first tab and manages all caption delivery destinations.

Click + Add target to add a new entry. Each entry can be:
| Type | Description |
|---|---|
| YouTube | A YouTube stream key — captions are sent to that stream via YouTube’s HTTP POST caption ingestion API |
| Viewer | A viewer key — captions are broadcast to audience members via the public SSE endpoint at /viewer/:key. Viewers open the viewer page at /view/:key or the embed widget at /embed/viewer. |
| Generic | A custom HTTP POST endpoint with optional JSON headers |
You can add multiple targets (e.g. two YouTube streams and a viewer feed). Each target has an enable toggle. Only enabled targets receive captions.
Each target can also have Disable batch sending enabled, which forces captions to be sent individually to that target regardless of the global batch setting.
Add a YouTube target here with your stream key if you want to send captions directly to a YouTube Live stream.
Viewer targets
Viewer targets broadcast captions to anyone with the viewer page URL — no YouTube account required. After adding a viewer target you’ll see a shareable link:
https://app.lcyt.fi/view/<your-viewer-key>?server=https://api.lcyt.fiYou can also use the embeddable viewer widget:
https://app.lcyt.fi/embed/viewer?key=<your-viewer-key>&server=https://api.lcyt.fiThe viewer page displays the current caption prominently with a dimmed history list. It connects to the backend via Server-Sent Events and reconnects automatically on disconnect.
You can optionally assign an icon (PNG or SVG logo) to a viewer target. The icon is shown in the viewer page header. Upload icons in Settings → Icons (see below).
Service tab {#service}
The Service tab controls which speech-to-text engine is used and how it is configured.

STT engine
| Option | Description |
|---|---|
| Web Speech API | Browser built-in (Chrome / Edge). No account required. Enable prefer local to use on-device recognition (no audio sent to server). |
| Google Cloud STT | Higher accuracy, more language models. Requires a service account JSON key. |
Microphone
Select which microphone to use if your device has more than one. Click Refresh to update the list.
Recognition language
Choose the spoken language for the speech recogniser. Type to filter the list.
STT model (Google Cloud only)
| Model | Best for |
|---|---|
latest_long | Long-form speech; best for broadcast |
latest_short | Short commands; lower latency |
telephony | Phone-quality audio |
Additional Cloud STT options: Auto-punctuation, Profanity filter, Confidence threshold, Max caption length, and Google Service Account key upload.
Utterance end button (advanced mode only)
Shows a 🗣 icon on the audio meter during active speech recognition. Click it to force-end the current utterance immediately (commits the partial transcript as a final caption).
Utterance end timer (advanced mode only)
Automatically force-ends the utterance after N seconds (0 = disabled). Useful for segmenting long speeches into shorter captions.
Details tab (advanced mode only) {#details}
This tab is only visible when Show advanced options is enabled in Settings → Basic.
Batching
| Setting | Description |
|---|---|
| Batch window | 0 = send each caption immediately. 1–20 s = collect captions over the window, then send as a single batch. |
Transcription offset
Shifts the caption timestamp relative to when the transcription arrives. Use a negative value (e.g. −5 s) to compensate for transcription processing delay, so captions line up with the moment the speaker started talking in the YouTube stream.
Double-click the slider to reset to 0.
Client-side VAD
Voice Activity Detection (VAD) monitors microphone energy and forces the recogniser to finalise when silence is detected. Helps segment long unbroken speech on mobile Chrome.
| Setting | Description |
|---|---|
| Enable VAD | Turn on silence detection (WebKit engine only) |
| Silence duration | How long (ms) energy must stay below threshold before the recogniser is stopped |
| Energy threshold | RMS amplitude below which audio is considered silent (lower = more sensitive) |
Translation tab {#translation}
The Translation tab configures real-time caption translation.

Click + Add translation to add a target language. Each entry specifies:
| Field | Description |
|---|---|
| Enabled | Toggle this translation on/off |
| Language | Target language (e.g. en-US) |
| Target | captions (YouTube stream), file (local), or backend-file |
| Format | YouTube or WebVTT (for file targets) |
Translation vendors
| Vendor | Notes |
|---|---|
| MyMemory | Free, no API key needed |
| Google Cloud Translation | High quality; requires an API key |
| DeepL | Premium quality; requires an API key |
| LibreTranslate | Self-hosted; provide server URL and optional key |
Show original
Enable Show original to include the original text alongside the translation in the YouTube caption stream (separated by a line break).
Translation
LCYT can translate your captions in real time and deliver the translation alongside the original text.
Click CC in the top status bar, then select the Translation tab.
Translation vendor
| Vendor | Notes |
|---|---|
| MyMemory | Free, no API key required |
| Google Cloud Translation | High quality, wide language support; requires a Google Cloud API key |
| LibreTranslate | Self-hosted open-source option; provide your server URL and optional API key |
| DeepL | Premium translation quality; requires a DeepL API key |
Adding a translation target
Click + Add translation to add a new row. Each row defines one translation output:
| Field | Options | Description |
|---|---|---|
| Enabled | ☑ | Toggle this translation on/off without deleting it |
| Language | Any supported language | Target language for translation |
| Target | captions, file, backend-file | Where the translated text is delivered |
| Format | youtube, vtt | Caption format (for file targets only) |
Target options
| Target | Behaviour |
|---|---|
| captions | Translation is appended below the original caption on the YouTube stream (separated by <br>) |
| file | Translation is saved as a local file in the chosen format |
| backend-file | Translation is saved as a file on the relay backend server |
Note: Only one
captionstarget is allowed at a time (YouTube accepts one caption block per request).
Multilingual video player
Every enabled translation language automatically becomes a selectable subtitle track in the embeddable video player at GET /video/:key — no extra configuration required. Viewers use their browser’s built-in CC button to switch languages.
See Multilingual Video Player for setup instructions and embed code.
Show original
Enable Show original to keep the original caption text in the stream alongside the translation. When disabled, only the translation is shown.
API key setup
Google Cloud
- Create a project in the Google Cloud Console.
- Enable the Cloud Translation API.
- Create an API key and paste it into the Google Cloud API Key field.
LibreTranslate
- Deploy a LibreTranslate instance (or use a public one).
- Enter the server URL (e.g.
https://translate.example.com). - Optionally enter an API key if your server requires one.
Settings
Click Settings in the top status bar to open the Settings modal.
Basic tab
The Basic tab contains all connection credentials and core preferences.
| Field | Description |
|---|---|
| Backend URL | URL of the LCYT relay backend (default: https://api.lcyt.fi) |
| API Key | Your LCYT API key — get one at lcyt.fi/app |
| Stream Key | YouTube Live stream key from YouTube Studio |
| Auto-connect | Reconnect automatically the next time you open the app |
| Theme | Auto (system), Dark, or Light |
| Language | UI display language (English / Finnish / Swedish) |
| Text size | Font size in the caption preview area (10–24 px) |
| Show advanced options | Reveals the Stream tab here, and the Details tab in the CC modal |
All fields are saved to your browser automatically as you type — no explicit Save button is needed.
Stream tab (advanced mode only)
This tab is only visible when Show advanced options is enabled on the Basic tab.
The Stream tab controls the RTMP relay and its associated broadcast settings.
Relay active toggle
Enable Active to start relaying your incoming RTMP stream to all configured destinations. When inactive, the backend accepts the stream but does not forward it. The toggle takes effect immediately — if your RTMP stream is already live when you enable the relay, fan-out starts without reconnecting.
Relay destinations
Click + Add relay to configure a new RTMP destination. Each entry supports:
| Type | Description |
|---|---|
| YouTube | Enter your YouTube RTMP stream key. The full ingest URL (rtmp://a.rtmp.youtube.com/live2/<key>) is shown as a preview. |
| Generic | Enter a custom RTMP base URL and optional stream name / key. |
Click ✕ to remove a destination. You can configure up to 4 destinations.
Per-slot advanced options (⚙ gear button)
Each relay slot has an optional advanced settings panel (click the ⚙ gear icon):
| Option | Description |
|---|---|
| Caption mode | http (default) — send captions via YouTube’s HTTP ingestion API. cea708 — embed captions directly in the RTMP video stream (requires CEA-708 capable ffmpeg on the server). |
| Scale | Output video resolution, e.g. 1280x720. Enable the Use original checkbox to pass the original resolution through unchanged. |
| FPS | Output frame rate (integer). Enable Use original to keep the source frame rate. |
| Video bitrate | e.g. 3000k or 6M. Leave blank or check Use original to keep the source bitrate. |
| Audio bitrate | e.g. 128k. Leave blank or check Use original to keep the source audio bitrate. |
Transcoding (scale / FPS / bitrate) and CEA-708 caption mode cannot be combined on the same key — CEA-708 takes priority.
RTMP ingest address
When the relay is enabled on the server, the ingest address is shown at the bottom of the Stream tab:
rtmp://<server>/stream/<your-api-key>Configure your broadcasting software (e.g. OBS) to push to this address. The stream key is your API key.
DSK RTMP ingest address
If the server supports DSK (Downstream Keyer) RTMP ingest, an additional address is shown:
rtmp://<server>/dsk/<your-api-key>Push a second RTMP stream (e.g. a green-screen graphics feed) to this address to composite it on top of the main stream.
Requires an active backend connection and
relay_allowedpermission on your API key.
Controls Panel
Click Controls in the top status bar to open the Controls floating panel.
The Controls panel combines the session status display and diagnostic actions in one convenient location.
Status section

| Row | Description |
|---|---|
| Connection | Green ● Connected or grey ○ Disconnected |
| Backend URL | The relay backend the app is talking to |
| Sequence | Caption sequence number — increments with every caption sent |
| Clock offset | Difference (ms) between your browser clock and the server clock. Used for accurate caption timestamps |
| Last connected | Time of the most recent successful connection |
Stats button
Click Stats to open the Usage Stats modal. It shows per-key caption counts, daily limits, and session history. Requires an active connection.
My Files button
Click My Files to list caption and translation files saved on the backend for your API key, with download and delete options. Requires an active connection.
Actions section
| Action | Description |
|---|---|
| ⟳ Sync Now | Runs an NTP-style clock sync with the backend to minimise timestamp drift. Run this if captions appear noticeably early or late |
| ♥ Heartbeat | Sends a blank caption to verify the connection end-to-end without showing anything on stream |
| ↺ Reset sequence | Resets the caption sequence counter to 0. Use if the YouTube stream shows duplicate or out-of-order captions |
| ↗ Set sequence | Manually set the sequence counter to a specific number |
| 🗑 Clear saved config | Removes all locally stored settings (API key, stream key, preferences). Does not affect server-side data |
Caption codes
Active metadata codes sent alongside every caption. Click a code button to toggle it:
| Code | Effect |
|---|---|
| lang | Set the speaker language (overrides the input bar language picker) |
| no-translate | Prevent translation for captions with this code |
| custom code | Add any arbitrary key: value metadata pair |
File-level metadata (<!-- lang: fi-FI -->) overrides per-line codes.
File actions
| Button | Description |
|---|---|
| ✏ Edit File | Switch the current file to raw text editor mode. Hold 2 seconds (or click without a file) to create a new file |
| ✕ Clear sent log | Remove all entries from the sent captions log |
Keyboard Shortcuts
LCYT is designed for fast, keyboard-driven operation during a live broadcast.
Global shortcuts (always active)
| Shortcut | Action |
|---|---|
Ctrl+, / Cmd+, | Open / close Settings |
Ctrl+1 … Ctrl+9 / Cmd+1 … Cmd+9 | Switch to file tab 1–9 |
Shortcuts active when no text input is focused
These shortcuts are blocked when you are typing in any text field, to avoid accidentally sending captions or navigating while editing.
Sending
| Shortcut | Action |
|---|---|
Enter | Send the current caption (or the focused file line) |
File navigation (when a script file is loaded)
| Shortcut | Action |
|---|---|
↑ / ↓ | Move to the previous / next line |
Page Up / Page Down | Jump 10 lines back / forward |
Home | Jump to the first line |
End | Jump to the last line |
Tab | Cycle between open file tabs |
Modals
| Shortcut | Action |
|---|---|
Escape | Close the currently open modal or floating panel |
Shortcuts reference in the app
All keyboard shortcuts are listed in the Settings → Credentials & Shortcuts tab for quick in-app reference.
Tips
- Keep the input bar unfocused (click anywhere outside it) to keep navigation shortcuts active.
- On mobile, use the navigation buttons in the mobile audio bar (−, ►, +) for the same line-navigation actions.
- Combine file navigation with speech recognition: navigate to a line and read it aloud while the mic is active, or manually advance through your script and send with Enter.
- Use Ctrl+1 to quickly jump to your first script file, Ctrl+2 for the second, and so on — handy when managing multiple scripts for different segments.
Embedding lcyt-web in Another Site
lcyt-web ships eight standalone embed widgets that you can drop into any page as <iframe> elements. Each widget renders only a specific part of the UI, configured entirely through URL parameters — no React knowledge required on the host site.
Overview
| Widget | Path | What it renders |
|---|---|---|
| Audio capture | /embed/audio | Microphone / speech recognition panel |
| Input bar + log | /embed/input | Text input field and sent-captions log (owns the session) |
| Sent log only | /embed/sentlog | Read-only delivery log (subscribes to a sibling widget’s session) |
| Simple file drop | /embed/file-drop | Drop one file → send lines one by one (owns the session) |
| Full file UI | /embed/files | Complete file manager: tabs, drop zone, caption view, input bar, sent log |
| Settings | /embed/settings | Connection credentials, theme, and CC targets (General + CC tabs) |
| RTMP relay | /embed/rtmp | RTMP relay slot management widget |
| Viewer | /embed/viewer | Read-only live caption viewer for audience members |
Looking for the video player? The embeddable multilingual video player is served directly from the backend, not from lcyt-web. Use
<iframe src="https://api.example.com/video/<key>">— see Multilingual Video Player.
Live iframe examples
Open any widget in a standalone iframe preview (opens a new window):
URL Parameters
All embed pages share these common URL parameters:
| Param | Description | Default |
|---|---|---|
server | Backend relay URL | (empty — prompts user to connect) |
apikey | LCYT API key | (empty) |
theme | dark or light | dark |
When both server and apikey are present the widget connects automatically on load.
EmbedSentLogPage(/embed/sentlog) does not connect to the backend itself and therefore ignoresserverandapikey. It receives those from a sibling widget on the same page viaBroadcastChannel.
Widget Details
/embed/audio — Audio Capture Widget
Renders the full AudioPanel (microphone button, interim text, VAD, translation pipeline). Owns the backend session when server + apikey are supplied.
<iframe
  src="https://your-lcyt-host/embed/audio?server=https://api.example.com&apikey=YOUR_KEY&theme=dark"
  allow="microphone"
  style="width:100%; height:220px; border:none;">
</iframe>
The
allow="microphone"attribute is required for speech recognition to work inside an iframe.
/embed/input — Input Bar + Sent Log Widget
Renders a text caption input field at the bottom and a scrollable sent-captions log above it. Owns its own backend session.
<iframe
  src="https://your-lcyt-host/embed/input?server=https://api.example.com&apikey=YOUR_KEY&theme=dark"
  style="width:100%; height:320px; border:none;">
</iframe>
/embed/sentlog — Sent Log Widget (read-only)
Renders only the sent-captions log. Does not own a session. Instead, it receives the session JWT token and caption texts from a sibling /embed/audio or /embed/input widget on the same host page via the browser’s BroadcastChannel API, then opens its own independent EventSource connection to /events on the backend to receive real-time delivery confirmations.
<iframe
  src="https://your-lcyt-host/embed/sentlog?theme=dark"
  style="width:100%; height:320px; border:none;">
</iframe>
Requirement: At least one other embed widget (/embed/audio, /embed/input, /embed/file-drop, or /embed/files) must be present on the same host page and connected to the backend.
/embed/file-drop — Simple File Drop Widget
The minimal caption-from-file widget. Phase 1 shows a large drag-and-drop zone (click to browse is also supported). Drop one .txt file and Phase 2 immediately shows the player:
- The current line is displayed prominently in the centre of the widget.
- ◀ Prev, Send, ▶ Next buttons control navigation and delivery.
- Keyboard shortcuts work without clicking buttons:
↑/↓to move,Enterto send and advance. - A ✕ reset link in the header returns to Phase 1 to load a different file.
- The connection status dot in the header shows whether the backend relay is connected.
Send delivers the current line to YouTube and automatically advances the pointer to the next line.
<iframe
  src="https://your-lcyt-host/embed/file-drop?server=https://api.example.com&apikey=YOUR_KEY&theme=dark"
  style="width:100%; height:280px; border:none;">
</iframe>
/embed/files — Full File Management Widget
Renders the complete file-based captioning workflow from the main app, without the status bar, settings modals, or audio panel:
- FileTabs row at the top — switch between open files, add new files, toggle drop zone.
- DropZone — collapsible drag-and-drop file loader (auto-hides once a file is loaded).
- CaptionView — scrollable line list with the active pointer highlighted; supports raw text editing.
- InputBar — text input with batch mode, translation, and all keyboard shortcuts.
- Sent log panel — togglable delivery log (✓✓ button in the toolbar); starts visible by default.
Line double-click in CaptionView sends that line immediately via the InputBar, exactly as in the main app.
<iframe
  src="https://your-lcyt-host/embed/files?server=https://api.example.com&apikey=YOUR_KEY&theme=dark"
  style="width:100%; height:640px; border:none;">
</iframe>
To start with the sent log panel hidden, add &sentlog=0 to the URL.
/embed/settings — Settings Widget
Renders the Settings panel as a standalone widget. Provides the General tab (backend URL, API key, stream key, theme) and the CC tab (caption targets, STT language, translation settings). The widget connects automatically if credentials are present in the URL.
<iframe
  src="https://your-lcyt-host/embed/settings?server=https://api.example.com&apikey=YOUR_KEY&theme=dark"
  style="width:100%; height:480px; border:none;">
</iframe>
Useful for building custom operator dashboards where settings management and captioning are in separate panels.
/embed/rtmp — RTMP Relay Widget
Renders the RTMP relay slot management UI as a standalone widget. Shows the relay active toggle, configured slots, RTMP ingest address, and per-slot advanced options (scale, FPS, bitrate, caption mode).
<iframe
  src="https://your-lcyt-host/embed/rtmp?server=https://api.example.com&apikey=YOUR_KEY&theme=dark"
  style="width:100%; height:320px; border:none;">
</iframe>
Requires an active backend connection and relay_allowed on the API key.
/embed/viewer — Caption Viewer Widget
Renders a read-only live caption display for audience members. Connects directly to the backend’s public GET /viewer/:key SSE endpoint — no API key or JWT required.
<iframe
  src="https://your-lcyt-host/embed/viewer?key=my-event-key&server=https://api.example.com&theme=dark"
  style="width:100%; height:200px; border:none;">
</iframe>
URL parameters specific to /embed/viewer:
| Param | Description | Default |
|---|---|---|
key | Viewer key configured by the streamer | (required) |
server | Backend URL | (required) |
theme | dark or light | dark |
This widget does not need apikey or a session — it is intended for the audience, not the operator. The server and key parameters are required; the widget shows a “waiting for stream” state until captions arrive.
The full-screen version (non-embed) is available at /view/:key?server=<backendUrl>.
Cross-Widget Communication
When widgets are spread across different parts of the same host page they coordinate using the browser’s BroadcastChannel API (channel name: 'lcyt-embed'). All iframes must be served from the same origin (the same lcyt-web deployment URL) for BroadcastChannel to work — this is a browser security requirement.
Message types
| Type | Direction | Payload |
|---|---|---|
lcyt:session | audio/input → sentlog | { token, backendUrl } — sent on connect and in response to lcyt:request_session |
lcyt:caption | audio/input → sentlog | { requestId, text, timestamp } — sent for each caption dispatched to the backend |
lcyt:request_session | sentlog → audio/input | (no payload) — sent on mount so a late-joining sentlog gets the token |
The sentlog widget also opens its own EventSource to GET /events?token=... on the backend to receive caption_result and caption_error events independently, without going through the session-owning widget.
Splitting the UI Across a Host Page
A common integration pattern is to place each widget in a different region of the host page:
<!-- Left sidebar: microphone -->
<div id="sidebar-left">
  <iframe
    src="https://your-lcyt-host/embed/audio?server=https://api.example.com&apikey=YOUR_KEY"
    allow="microphone"
    style="width:100%; height:240px; border:none;">
  </iframe>
</div>

<!-- Main content: text input -->
<div id="main-input">
  <iframe
    src="https://your-lcyt-host/embed/input?server=https://api.example.com&apikey=YOUR_KEY"
    style="width:100%; height:300px; border:none;">
  </iframe>
</div>

<!-- Right sidebar: delivery log (read-only, no credentials needed) -->
<div id="sidebar-right">
  <iframe
    src="https://your-lcyt-host/embed/sentlog"
    style="width:100%; height:400px; border:none;">
  </iframe>
</div>
Only one widget should own the session at a time. If both
/embed/audioand/embed/inputare on the page with the same credentials they will each start a separate session — captions from one will not appear in the other’s log unless you use/embed/sentlog(which listens to all sibling broadcasts). For a split audio + log layout, use/embed/audioas the session owner and/embed/sentlogfor the delivery log.
CORS Configuration
The backend must accept requests from the origin of the host page (not the lcyt-web origin). Configure the ALLOWED_DOMAINS environment variable on the backend to include the host site’s domain:
ALLOWED_DOMAINS=lcyt.fi,www.lcyt.fi,yoursite.com,www.yoursite.comThe embed widgets themselves are served from the lcyt-web origin and communicate with the backend using the API key — the CORS domain is the domain registered when the API key was created, which must match the domain field sent in POST /live.
Listening for postMessage Events (Optional)
All embed pages that own a session (/embed/audio, /embed/input) are ready for future postMessage integration with the host page. Currently, the BroadcastChannel mechanism handles cross-widget communication automatically. If you need the host page itself to react to caption events you can listen on the BroadcastChannel from a host-page script:
const ch = new BroadcastChannel('lcyt-embed');
ch.onmessage = (ev) => {
  if (ev.data.type === 'lcyt:caption') {
    console.log('Caption sent:', ev.data.text);
  }
  if (ev.data.type === 'lcyt:session') {
    console.log('Session token received');
  }
};
Note:
BroadcastChannelonly works between same-origin contexts. The host page script must be served from the same origin as the embed iframes (i.e., the lcyt-web deployment URL), or you must use the iframes’ ownpostMessageAPI relayed through the parent page.
Multilingual Video Player
When you configure a viewer target in the CC → Targets tab, the backend automatically generates an embeddable video player at:
https://api.example.com/video/<viewer-key>This player combines your live video stream with real-time subtitle tracks in every language you have configured under CC → Translation. Viewers can select their preferred language using their browser’s built-in CC (closed captions) button — no custom controls are needed.
What you need
- HLS video stream — the RTMP stream you send to the server must have
hls_enabled = trueon your API key (set by an admin). The video and subtitle tracks share the same key. - Viewer target — configure a viewer target in CC → Targets with the same key you use for the HLS stream. Every caption you send is automatically transcribed into subtitle segments.
- Translations (optional) — add one or more translation languages in CC → Translation. Each language appears as a separate subtitle track in the player.
Setting up
1. Configure a viewer target
Open CC → Targets tab and add a target:
| Field | Value |
|---|---|
| Type | Viewer |
| Viewer key | A short, unique identifier for your event (e.g. my-event-2026) |
Use the same key for the HLS video stream (the stream key configured in nginx-rtmp must match).
2. Add translation languages (optional)
Open CC → Translation tab and add any languages you want as subtitle tracks. Each enabled language will appear in the player’s CC menu as a selectable track.
The original caption text is always included as the Original track regardless of whether any translations are configured.
3. Share the player URL
The player is available at:
https://api.example.com/video/<viewer-key>Replace api.example.com with your backend URL and <viewer-key> with the key you set in step 1.
Embedding the player
The player page is iframe-embeddable on any website:
<iframe
  src="https://api.example.com/video/my-event-2026"
  width="960" height="540"
  frameborder="0"
  allow="autoplay"
  allowfullscreen>
</iframe>
Theme
Add ?theme=light for a light background:
<iframe src="https://api.example.com/video/my-event-2026?theme=light" ...></iframe>Subtitle language selection
The player exposes all active subtitle tracks through the browser’s native CC button in the standard video controls:
- Chrome / Edge / Firefox — click the CC (⧉) button in the video controls to open the language menu.
- Safari (macOS / iOS) — click the CC button or the subtitles option in AirPlay / fullscreen controls.
- Android Chrome — tap the CC button in the controls.
Tracks appear as soon as the first captions arrive for that language — you do not need to reload the player.
How subtitles are generated
Each time a caption is sent, the backend:
- Writes the original text and each translation into rolling 6-second WebVTT segment files (one set per language).
- Updates an HLS subtitle playlist per language, using
EXT-X-PROGRAM-DATE-TIMEheaders so the player can align subtitle cues to the video by wall clock. - Serves a master HLS manifest that references both the video stream and all subtitle playlists.
Because the subtitle system uses the same viewer key as the SSE viewer endpoint (/viewer/:key), there is no extra configuration — any key that receives captions automatically gets a subtitle sidecar.
Subtitle track reference
| Track label in player | Source |
|---|---|
| Original | The raw text typed or captured via speech recognition |
| Finnish / Suomi | Translation to Finnish, if configured |
| German / Deutsch | Translation to German, if configured |
| (other languages) | Determined by which languages are enabled in CC → Translation |
Troubleshooting
| Symptom | Likely cause |
|---|---|
| ”Stream not live” message | The HLS video stream is not running (hls_enabled must be set for the key) |
| No CC button visible | No captions have been sent yet; the button appears once the first subtitle track is active |
| Subtitle track names show BCP-47 codes instead of language names | The language tag is not in the built-in name map; the tag itself is used as a fallback |
| Subtitles appear late or are offset from speech | Normal for live transcription; the backend writes segments every 6 seconds |
Technical details
For the full API reference, including manifest format, WebVTT segment format, and environment variables, see API: /video.
Python Minimal Backend
The Python Flask backend (python-packages/lcyt-backend) is a lightweight, self-hostable alternative to the full Node.js backend. It is designed for simple deployments — shared hosting (cPanel / Phusion Passenger), Raspberry Pi, or any environment where Node.js is unavailable or undesirable.
What the minimal backend provides
| Feature | Python backend | Node.js backend |
|---|---|---|
| Caption relay to YouTube | ✅ | ✅ |
| NTP clock sync | ✅ | ✅ |
| API key management | ✅ | ✅ |
| Per-key usage stats | ✅ | ✅ |
| JWT session tokens | ✅ (stdlib-only HS256) | ✅ |
| CORS support | ✅ | ✅ |
| User account registration / login | ❌ | ✅ |
| RTMP relay | ❌ | ✅ |
| HLS streaming | ❌ | ✅ |
| DSK graphics overlay | ❌ | ✅ |
| Server-side STT | ❌ | ✅ |
| Caption file storage | ❌ | ✅ |
| Production control (cameras / mixers) | ❌ | ✅ |
| Admin panel | ❌ | ✅ |
The web app detects which backend you are connecting to via GET /health feature discovery and automatically hides UI elements that are not supported — so the interface stays clean even on a minimal backend.
Deployment: cPanel / Shared Hosting
The Python backend ships a passenger_wsgi.py entry point for Phusion Passenger, which is available on most cPanel hosts.
1 — Upload files
Upload the contents of python-packages/lcyt-backend/ to a directory under your cPanel home (e.g. ~/lcyt-backend/).
2 — Install dependencies
Open the cPanel Terminal (or SSH):
cd ~/lcyt-backend
pip install -r requirements.txt
# or install the local library directly:
pip install -e ../lcyt -e .
3 — Configure environment
Copy .env.example to .env and edit:
JWT_SECRET=change-me-to-a-long-random-string
ADMIN_KEY=your-admin-password
DB_PATH=/home/youruser/lcyt-backend/lcyt-backend.db
PORT=3000
Tip: Generate a secure secret with
python3 -c "import secrets; print(secrets.token_hex(32))".
4 — Set up Passenger
In cPanel → Setup Python App, point the application root to ~/lcyt-backend/ and set the startup file to passenger_wsgi.py.
Passenger will automatically restart the app when the file changes. To trigger a manual restart:
touch ~/lcyt-backend/passenger_wsgi.py5 — Create an API key
Use the admin CLI or make a direct POST /keys request with your ADMIN_KEY:
curl -X POST https://your-domain.com/keys \
  -H "X-Admin-Key: your-admin-password" \
  -H "Content-Type: application/json" \
  -d '{"label": "My Key"}'
The response contains the key value — save this as your LCYT API key.
Deployment: local development
cd python-packages/lcyt-backend
pip install -e ../lcyt -e .
python run.py
# → Listening on http://localhost:3000
Connecting the web app to the minimal backend
When you open the web app and go to /login:
- In the Backend dropdown, choose Minimal (or enter your custom URL).
- The app probes
GET /healthon your backend. - Because the
loginfeature is not in the response, the login form changes to API key only — no email/password needed. - Enter your API key and click Continue.
No user account is needed on a minimal backend. The API key is the only credential.
The sidebar will automatically hide features not supported by the minimal backend (RTMP, Graphics, Production, Admin, AI, Projects/Account). You are left with a focused interface for captioning.
API summary
The minimal backend exposes the same core REST API as the Node.js backend:
| Method | Path | Purpose |
|---|---|---|
GET | /health | Uptime, session count, features list |
POST | /live | Register session → session JWT |
GET | /live | Session status |
DELETE | /live | Tear down session |
POST | /captions | Queue caption(s) |
GET | /events | SSE caption delivery results |
POST | /sync | NTP clock sync |
GET | /stats | Per-key usage stats |
GET/POST/PATCH/DELETE | /keys | API key CRUD (admin) |
The GET /health response shape:
{
  "ok": true,
  "uptime": 123.4,
  "sessions": 1,
  "features": ["captions", "sync", "stats"]
}
The absence of login, rtmp, graphics, production, and admin in the features list is what triggers the minimal-mode UI in the web app.
Environment variables
| Variable | Purpose | Default |
|---|---|---|
JWT_SECRET | HS256 signing key | auto-generated (warns in log) |
ADMIN_KEY | X-Admin-Key header value | none (disables admin) |
DB_PATH | SQLite file path | ./lcyt-backend.db |
SESSION_TTL | Session timeout (ms) | 7200000 (2 h) |
CLEANUP_INTERVAL | Session sweep interval (ms) | 300000 (5 min) |
PORT | HTTP port | 3000 |
Key differences from the Node.js backend
- No user accounts — all auth is API-key based.
- Stdlib-only JWT — no
jsonwebtokenorPyJWT; uses Python’shmac+hashlib. - No plugins — RTMP, DSK, STT, files, production control are not available.
- Synchronous SQLite — uses Python’s
sqlite3stdlib; no async DB layer. - cPanel-compatible —
passenger_wsgi.pyprovides a WSGI entry point for shared hosting.
Upgrading to the full Node.js backend
If you outgrow the minimal backend, migrate by:
- Deploying
packages/lcyt-backend/with Node.js 20+. - Running
npm installfrom the repo root. - Copying your API keys (they use the same format).
- Pointing the web app at the new backend URL and re-authenticating.
All captions sent through the minimal backend are delivered the same way — there is no data to migrate.
Application Flow
This page shows how all parts of the LCYT web app work together — from logging in to captions appearing on YouTube.
Full system flow
flowchart TB
    subgraph Auth["Login & Session"]
        direction TB
        L1["Open /login\nChoose backend preset\n(Normal / Minimal / Custom)"]
        L2["Probe GET /health\nDiscover features"]
        L3{"login feature?"}
        L4["Email + Password\n→ POST /auth/login\n→ User JWT (30 d)"]
        L5["API Key entry only\n(minimal mode)"]
        L6["POST /live\n{ apiKey, targets[] }\n→ Session JWT"]
    end

    subgraph Input["Caption Input"]
        direction TB
        I1["Manual typing\nin Input Bar"]
        I2["Browser microphone\nWeb Speech API"]
        I3["Script file\n(.txt / .lcyt)\nstep line by line"]
        I4["Server-side STT\nGoogle / Whisper / OpenAI\naudio from HLS or RTMP"]
    end

    subgraph Backend["LCYT Backend"]
        direction TB
        B1["POST /captions\n{ text, timestamp }"]
        B2["Metacode processor\nstrips graphics: cue: tags"]
        B3["_sendQueue\nserialised delivery\nmonotonic sequence #"]
        B4["CueEngine\nphrase / fuzzy / semantic / AI\nevent cue matching"]
        B5["DSK caption processor\ngraphics metacodes → SSE"]
        B6["Session emitter\nroutes results to SSE"]
    end

    subgraph Targets["Delivery Targets"]
        direction TB
        T1["YouTube Live\nHTTP POST\n/caption_ingestion/v1"]
        T2["Viewer SSE\nGET /viewer/:key\npublic — no auth"]
        T3["Generic HTTP\nPOST to custom URL\n{ source, sequence, captions }"]
    end

    subgraph Results["Delivery Results"]
        direction TB
        R1["GET /events SSE stream\ncaption_result / caption_error\nmic_state / cue_fired"]
        R2["Sent log in UI\ngreen = delivered\nred = error"]
    end

    L1 --> L2 --> L3
    L3 -- Yes --> L4 --> L6
    L3 -- No  --> L5 --> L6

    I1 & I2 & I3 & I4 --> B1
    L6 -->|Bearer token| B1

    B1 --> B2
    B2 --> B3
    B2 --> B5
    B2 --> B4
    B3 --> T1 & T2 & T3
    T1 & T2 & T3 --> B6
    B6 --> R1 --> R2
Caption target types
flowchart LR
    CAP["Caption text\n+ sequence #"]

    CAP --> YT
    CAP --> VIEWER
    CAP --> GENERIC

    subgraph YT["YouTube target"]
        YTA["YoutubeLiveCaptionSender\nHTTP POST to ingestion URL\nwith stream key"]
        YTB["YouTube closes-caption\ntrack on the live stream"]
        YTA --> YTB
    end

    subgraph VIEWER["Viewer target"]
        VA["broadcastToViewers(key, payload)"]
        VB["GET /viewer/:key\nSSE stream — CORS *\npublic — no auth required"]
        VC["lcyt-tv Android app\nor embedded viewer page\n/view/:key"]
        VA --> VB --> VC
    end

    subgraph GENERIC["Generic target"]
        GA["HTTP POST\nto configured URL\nwith custom headers"]
        GB["Any webhook receiver\nexternal system"]
        GA --> GB
    end
RTMP & streaming flow
flowchart TB
    subgraph Sources["Sources"]
        CAM["Cameras\n(AMX / VISCA-IP / Webcam)"]
        SCR["Screen / Desktop"]
        AUD["Microphone / Audio"]
    end

    subgraph AV["AV Layer"]
        MIX["Video Mixer\n(Roland / ATEM / OBS / AMX / LCYT)"]
    end

    subgraph Ingest["RTMP Ingest"]
        ENC["RTMP Encoder\n(OBS / hardware)"]
        MTX["MediaMTX\nRTMP server"]
    end

    subgraph lcytBackend["LCYT Backend — lcyt-rtmp plugin"]
        HLS["HLS Manager\nvideo + audio\n/stream-hls/:key"]
        RADIO["Radio Manager\naudio-only HLS\n/radio/:key"]
        PREV["Preview Manager\nJPEG thumbnail\n/preview/:key"]
        STT["STT Manager\nGoogle / Whisper / OpenAI\n→ auto captions"]
        RELAY["RTMP Relay\nup to 4 destinations"]
        SUBS["HLS Subs Manager\nWebVTT subtitle\nsidecar segments"]
        DSK["DSK Renderer\nPlaywright + Chromium\ngraphics overlay"]
    end

    subgraph Outputs["Outputs"]
        YT_STREAM["YouTube Live\nvideo stream\n(from encoder)"]
        YT_CAP["YouTube Captions\nHTTP POST API"]
        HLS_OUT["HLS player embed\nor any HLS client"]
        RADIO_OUT["Audio-only HLS\nradio player"]
        PREV_OUT["Preview thumbnail\nin web UI"]
        VIEWER_OUT["Caption viewer\n/view/:key"]
    end

    CAM & SCR & AUD --> MIX
    MIX -->|PGM out| ENC
    ENC -->|RTMP| MTX
    ENC -->|RTMP| YT_STREAM

    MTX --> HLS & RADIO & PREV & STT & RELAY
    HLS --> HLS_OUT
    RADIO --> RADIO_OUT
    PREV --> PREV_OUT
    STT -->|transcript| YT_CAP & VIEWER_OUT
    STT --> SUBS --> HLS_OUT

    DSK -->|keyed RTMP| MIX
    RELAY -->|RTMP| YT_STREAM
Multi-target session example
A typical broadcast session with captions on YouTube, a public viewer page, and an embedded HLS stream:
sequenceDiagram
    participant OP as Operator (lcyt-web)
    participant BE as LCYT Backend
    participant YT as YouTube API
    participant VW as Viewer SSE

    OP->>BE: POST /live { apiKey, targets: [youtube, viewer] }
    BE-->>OP: 200 { token, sessionId }

    OP->>BE: POST /captions { text: "Hello everyone" }
    BE-->>OP: 202 { ok, requestId }

    BE->>YT: POST /caption_ingestion/v1?streamKey=…
    YT-->>BE: 204 OK

    BE->>VW: broadcast { text, sequence, timestamp }

    BE-->>OP: SSE caption_result { requestId, ok: true }
    OP-->>OP: Sent log turns green ✓
DSK graphics flow
flowchart LR
    subgraph OP["Operator"]
        CAPTION["Caption with metacode\n<!-- graphics:logo,banner -->"]
    end

    subgraph BE["Backend — lcyt-dsk plugin"]
        PROC["DSK Caption Processor\nextracts graphics: tags"]
        SSE["DSK SSE stream\nGET /dsk/:key/events"]
        REND["Playwright Renderer\nheadless Chromium"]
        FFMPEG["ffmpeg\nframes → RTMP"]
    end

    subgraph Outputs["Outputs"]
        DSK_PAGE["DSK page /dsk/:key\ntransparent green-screen overlay\ndisplayed in browser or OBS"]
        RTMP_OUT["RTMP keyed output\n→ nginx-rtmp → mixer"]
    end

    CAPTION --> PROC
    PROC --> SSE --> DSK_PAGE
    PROC --> REND --> FFMPEG --> RTMP_OUT